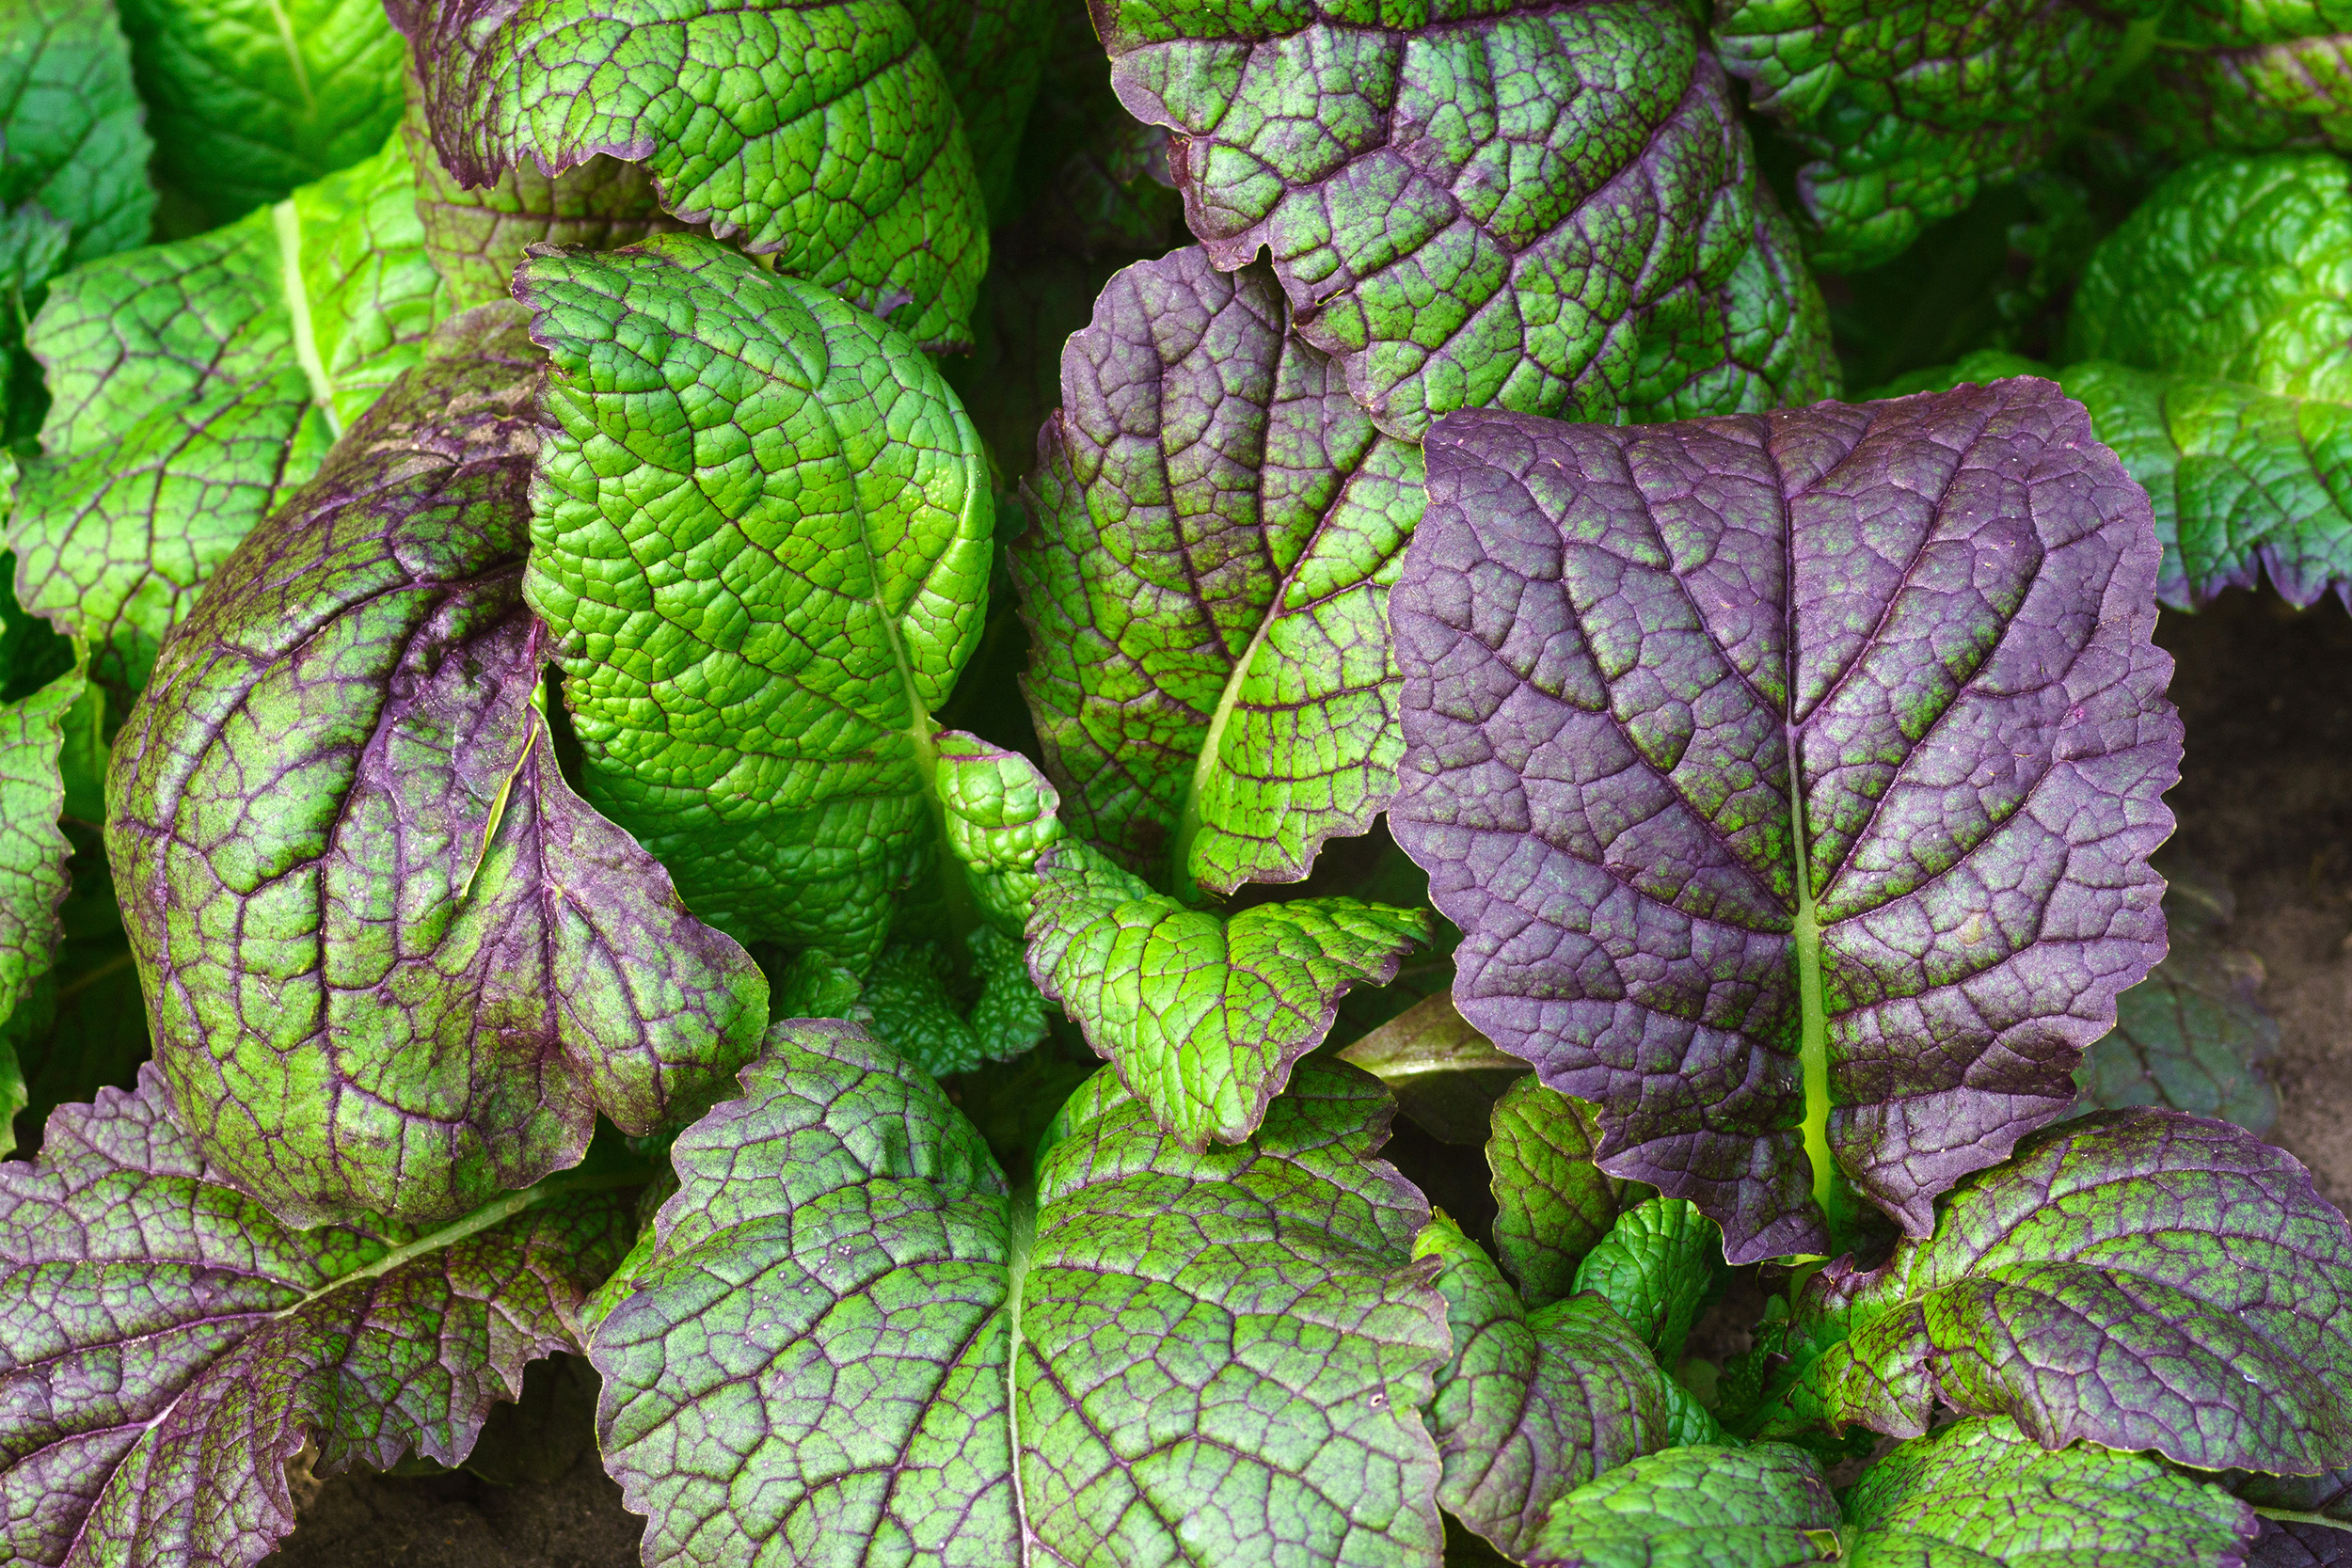
To grow mustard greens successfully in Memphis, plant them in the cooler months of spring and fall to avoid the summer heat, which can cause the leaves to become bitter. Since mustard greens are a fast-growing, cool-season crop, gardeners can expect a quick harvest when planted at the right time.
Best Time to Plant
- Spring crop: Sow seeds directly outdoors from mid-February to March. For an earlier harvest, you can start seeds indoors 4–6 weeks before the last frost, then transplant them outside in March.
- Fall crop: The preferable season for planting mustard greens is in the fall. Sow seeds directly in the garden during mid to late August. The cooler temperatures as they mature will produce sweeter, better-flavored leaves.
Site Selection and Soil
- Sunlight: Choose a garden spot with plenty of sunlight. While mustard greens prefer full sun, they can tolerate some partial shade.
- Soil preparation: Ensure your soil is fertile, well-drained, and rich in organic matter. Amend the soil by mixing in several inches of compost or aged manure. A soil pH of 6.5 to 6.8 is ideal.
Planting Seeds
- Sowing seeds: Sow seeds about 1/4 to 1/2 inch deep. For a continuous harvest, you can sow a new batch of seeds every 2–3 weeks during the spring and fall seasons.
- Spacing: Thin seedlings to 3 inches apart once they have 3–4 true leaves. For larger, mature plants, provide 12–18 inches of space between them.
Care and Maintenance
- Watering: Mustard greens need consistent moisture. Water regularly to keep the soil evenly moist but not soggy. Mulching with straw can help retain soil moisture.
- Fertilizing: To encourage healthy leaf production, you can apply a nitrogen-based liquid fertilizer, such as fish emulsion, about four weeks after the plants have sprouted.
- Pest control: Common pests include cabbage worms, aphids, and flea beetles. To control them, consider using floating row covers or spraying with a product containing Bacillus thuringiensis (Bt).
Harvesting and Storing
Harvesting Method
- Timing: Mustard greens mature quickly, usually within 4–6 weeks. For the best flavor, harvest the leaves while they are young and tender.
- “Cut-and-come-again” Technique: Snip the outer, larger leaves first and allow the smaller inner leaves to continue growing.
- Whole plant harvest: For a one-time harvest, cut the entire plant once the leaves reach full size.
Storing
- Store harvested mustard greens in the refrigerator for up to two weeks.
- For longer storage, you can blanch and freeze the greens.
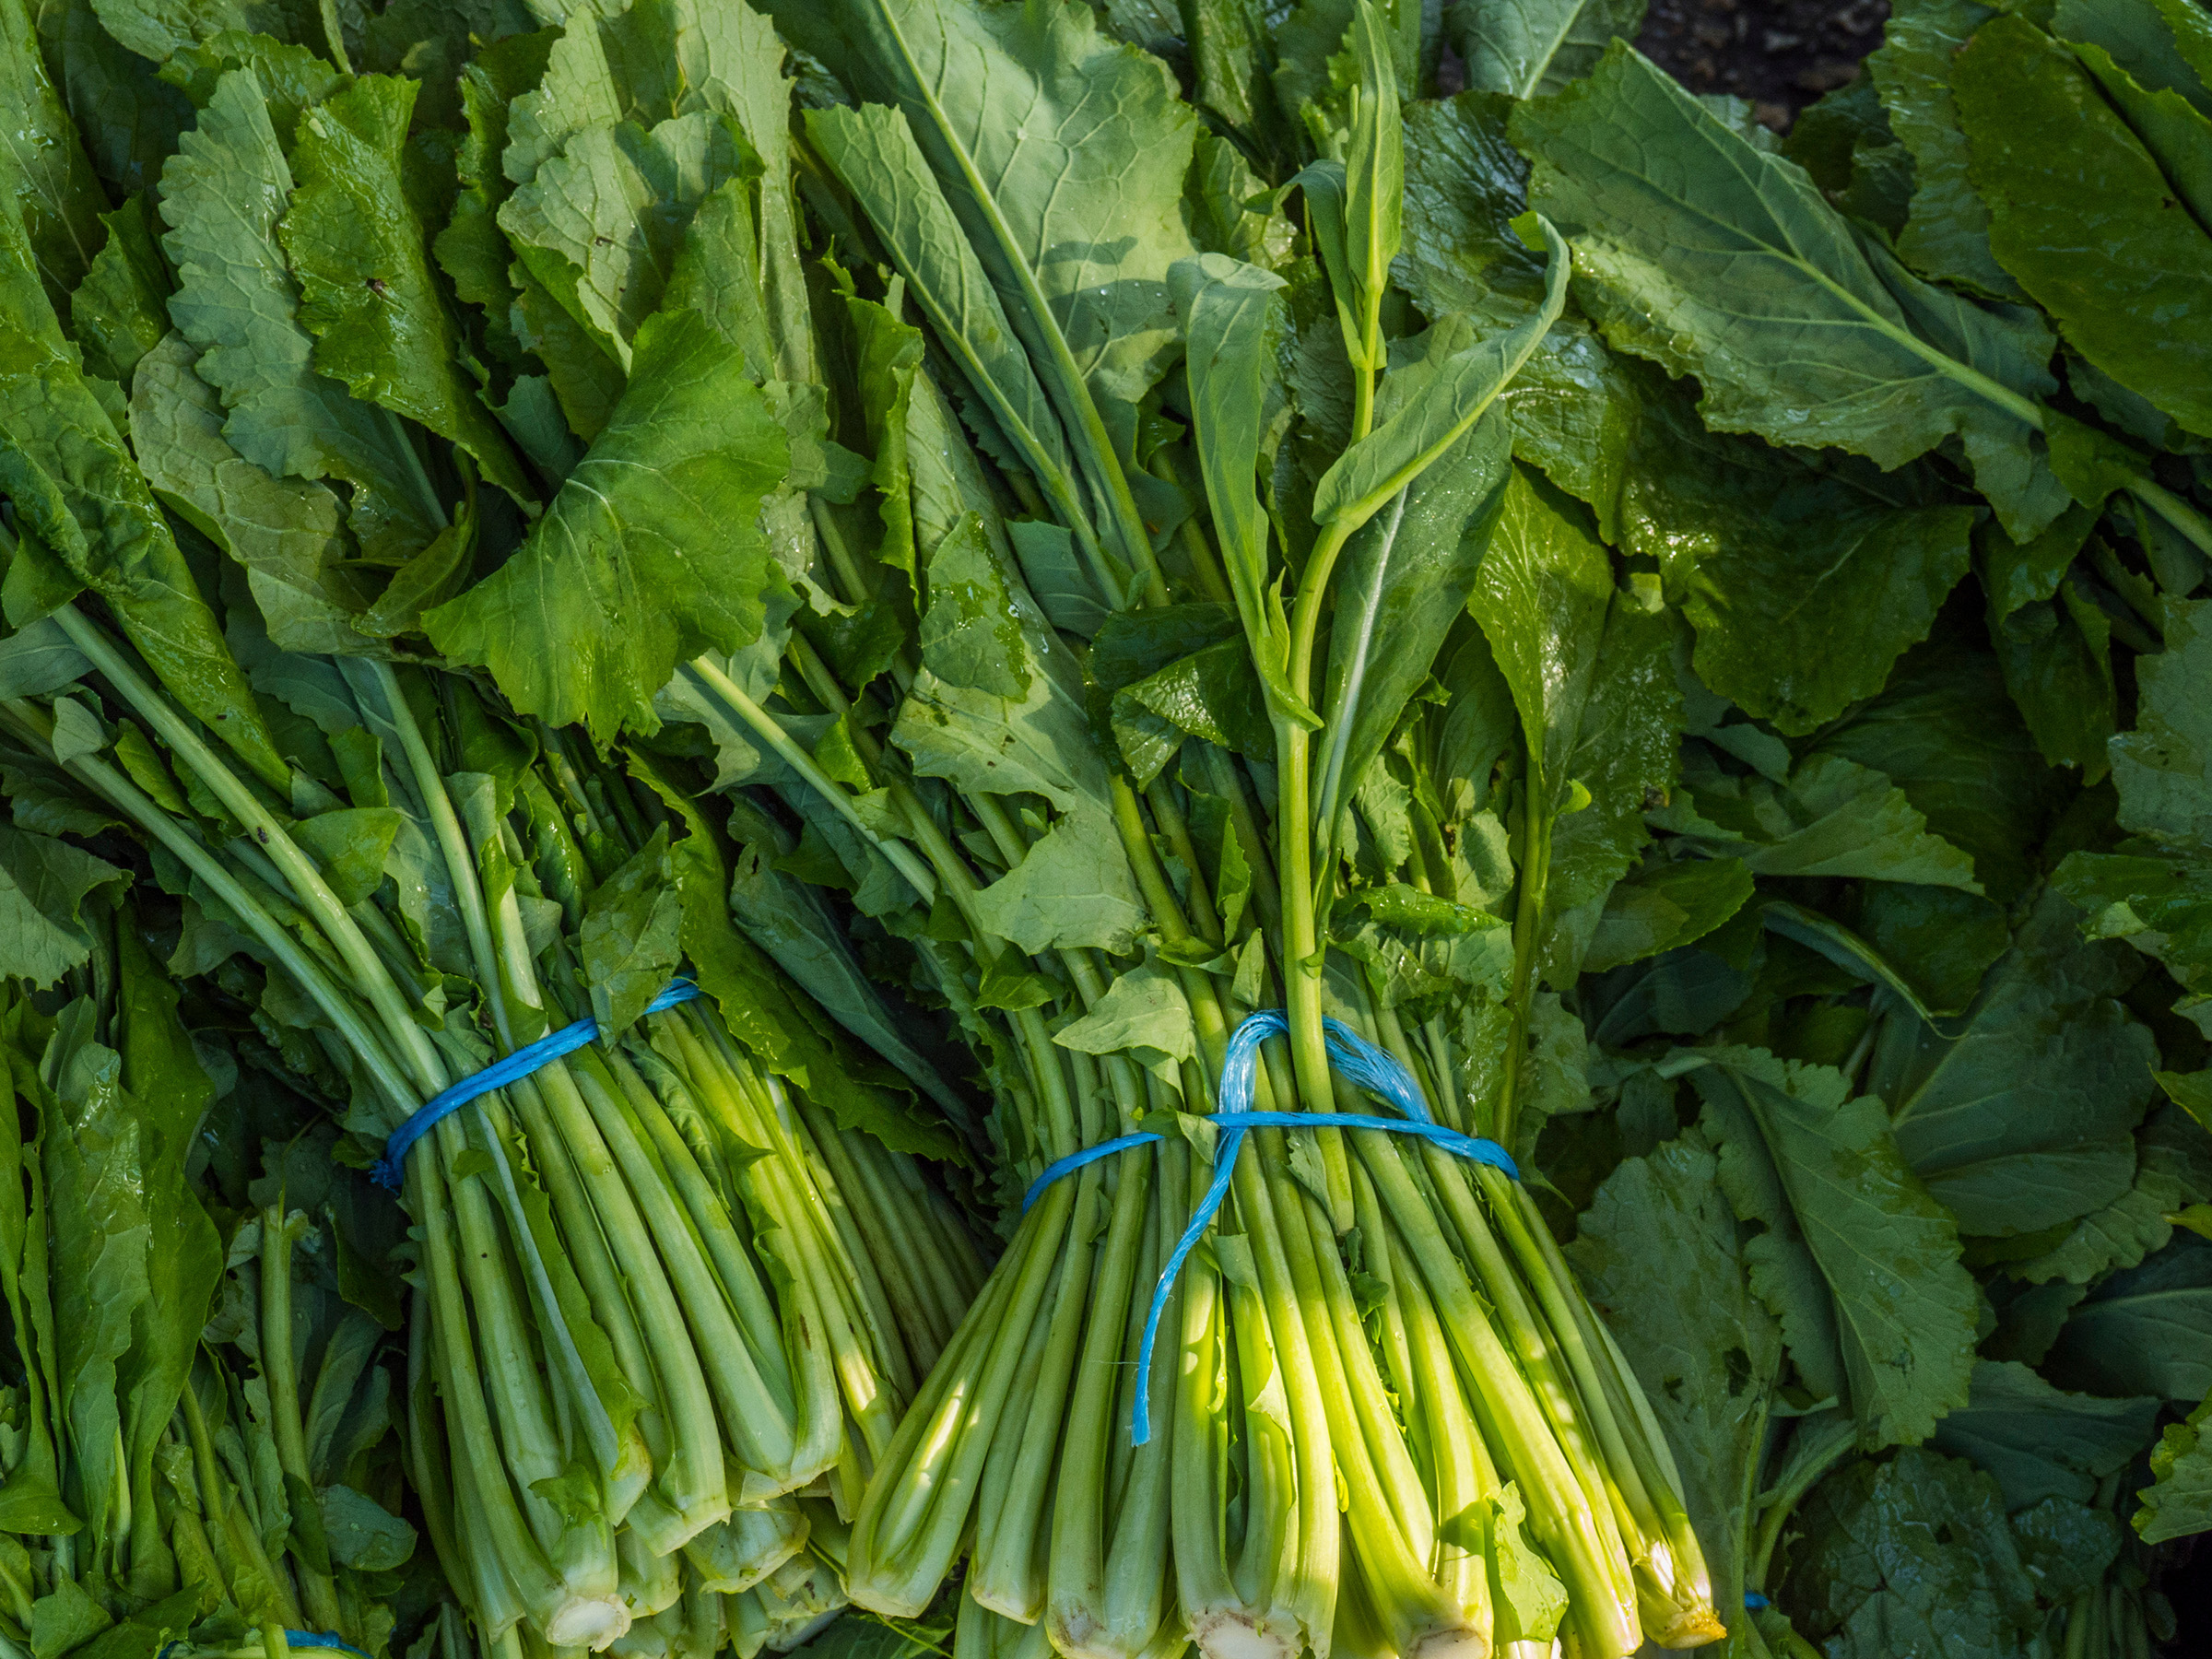
Turnip greens are a fast-growing, cool-season crop that is easy to cultivate and can be harvested multiple times. They can be grown for their tender, nutritious leaves in both spring and fall.
Best Time to Plant
For a fall crop, plant from late August to October. Cooler weather in the fall results in sweeter, more tender leaves.
Site Selection and Soil
- Choose a spot with full sun (at least six hours per day) and well-drained soil.
- Work several inches of compost or other organic matter into the top 4-10 inches of soil to prepare the bed.
Planting Seeds
- Sow seeds about 1/2 inch deep and 1 to 2 inches apart.
Rows should be 12 to 18 inches apart to allow for proper air circulation and easy harvesting. - If you’re planting for greens exclusively, you can sow seeds more densely, as crowding promotes larger foliage and smaller roots.
Watering
- Keep the soil consistently moist but not soggy, especially during germination and development.
- A soaker hose or drip irrigation is ideal for keeping the leaves dry and healthy.
Fertilizing
- If you are growing only for greens, you can use a high-nitrogen fertilizer to promote leafy growth.
- If you also want to harvest the turnip root, use a balanced fertilizer, as too much nitrogen will promote leafy growth at the expense of the root.
Pest and Disease Prevention
- Common pests include aphids, mites, and cabbage worms.
- Row covers can protect young plants from pests.
- Proper spacing and watering at the soil level can help prevent diseases like black rot.
Harvesting and Storing
Harvest Timing
Turnip greens can be ready for their first harvest in as little as 30 to 40 days, depending on the variety.
Harvesting Method
- Harvest the outer leaves once they are 4 to 6 inches tall, leaving the center leaves to continue growing. This “cut-and-come-again” method allows for multiple harvests.
- Harvesting after a light frost can make the leaves taste sweeter.
- For the best flavor, harvest leaves in the morning.
Storing
- Store unwashed leaves in a plastic bag in the refrigerator for up to five days.
- For longer storage, you can blanch and freeze the greens.
- Growing turnip greens is a rewarding way to get fresh, healthy vegetables from your garden.
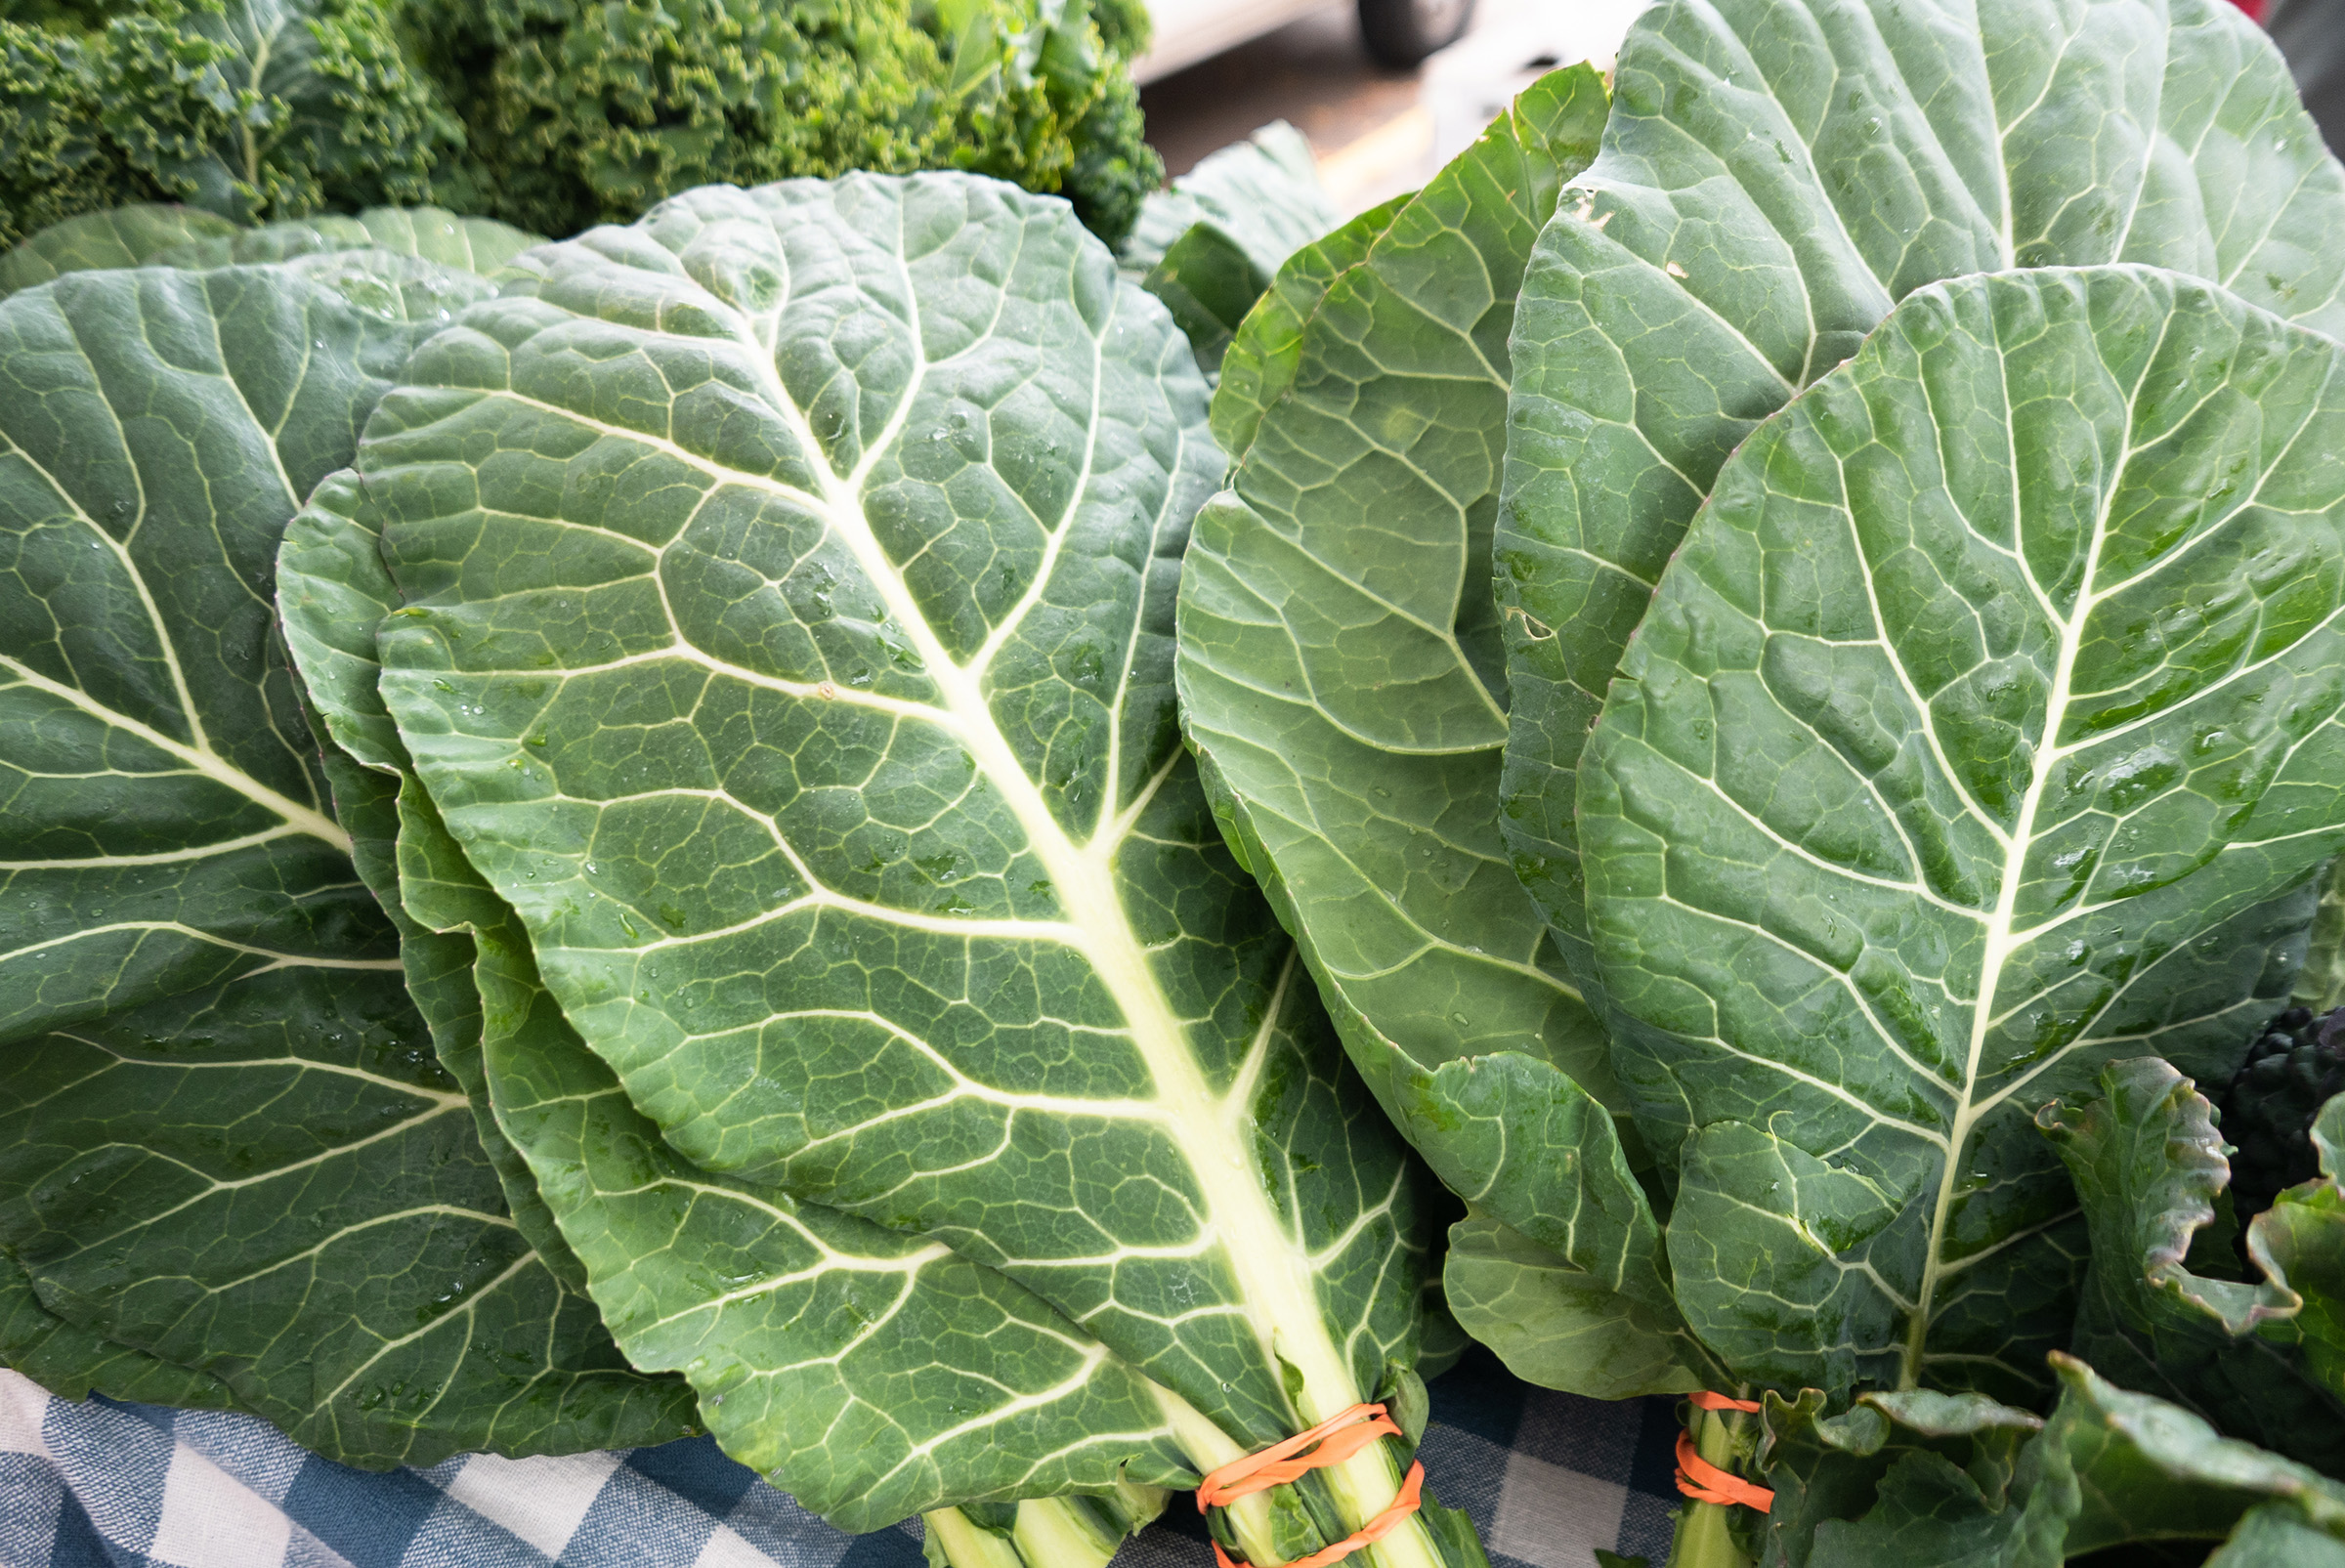
Collard greens are an excellent cool-weather crop for a fall harvest, and the flavor of the leaves actually improves after a light frost.
Best Time to Plant
- For a fall crop, you should plant seeds or transplants about 6 to 8 weeks before the first fall frost.
- Transplants can be planted in late summer, about 6 to 8 weeks before the first frost, or around mid-August to the beginning of September.
- For continuous harvest, you can direct-seed in mid-summer.
Site Selection and Soil
- Choose a spot with full sun (at least 6 hours per day) and fertile, well-drained soil with a pH between 6.5 and 6.8.
- Prepare the soil by mixing in several inches of organic matter, such as compost.
Planting Seeds
- Sow seeds about 1/2 inch deep. If direct seeding, space seeds 18 to 24 inches apart.
Watering
- Collards need consistent moisture, so provide 1 to 1.5 inches of water weekly if rainfall is insufficient.
Mulching
- Add a 3-inch layer of organic mulch, like compost or finely ground leaves, to help the soil retain moisture and keep weeds down.
Fertilizing
- Collards are heavy feeders, so feed them regularly with a nitrogen-rich fertilizer to support leafy growth.
Pest and Disease Prevention
- Fall-planted collards are often less susceptible to pests like cabbage worms, as these insects are less active in cooler weather.
Harvesting
Harvest Timing
- Begin harvesting the outer, lower leaves when they are about 10 inches long and still young and tender. New leaves will continue to grow from the center of the plant.
Harvesting Tips
- Enhanced flavor: The flavor of collards is sweeter when the leaves have been touched by a light frost, making a fall harvest especially delicious.
- Winter protection: Collards are very cold-hardy, but if you want to extend your harvest well into winter, cover your plants with a floating row cover during prolonged freezing temperatures.
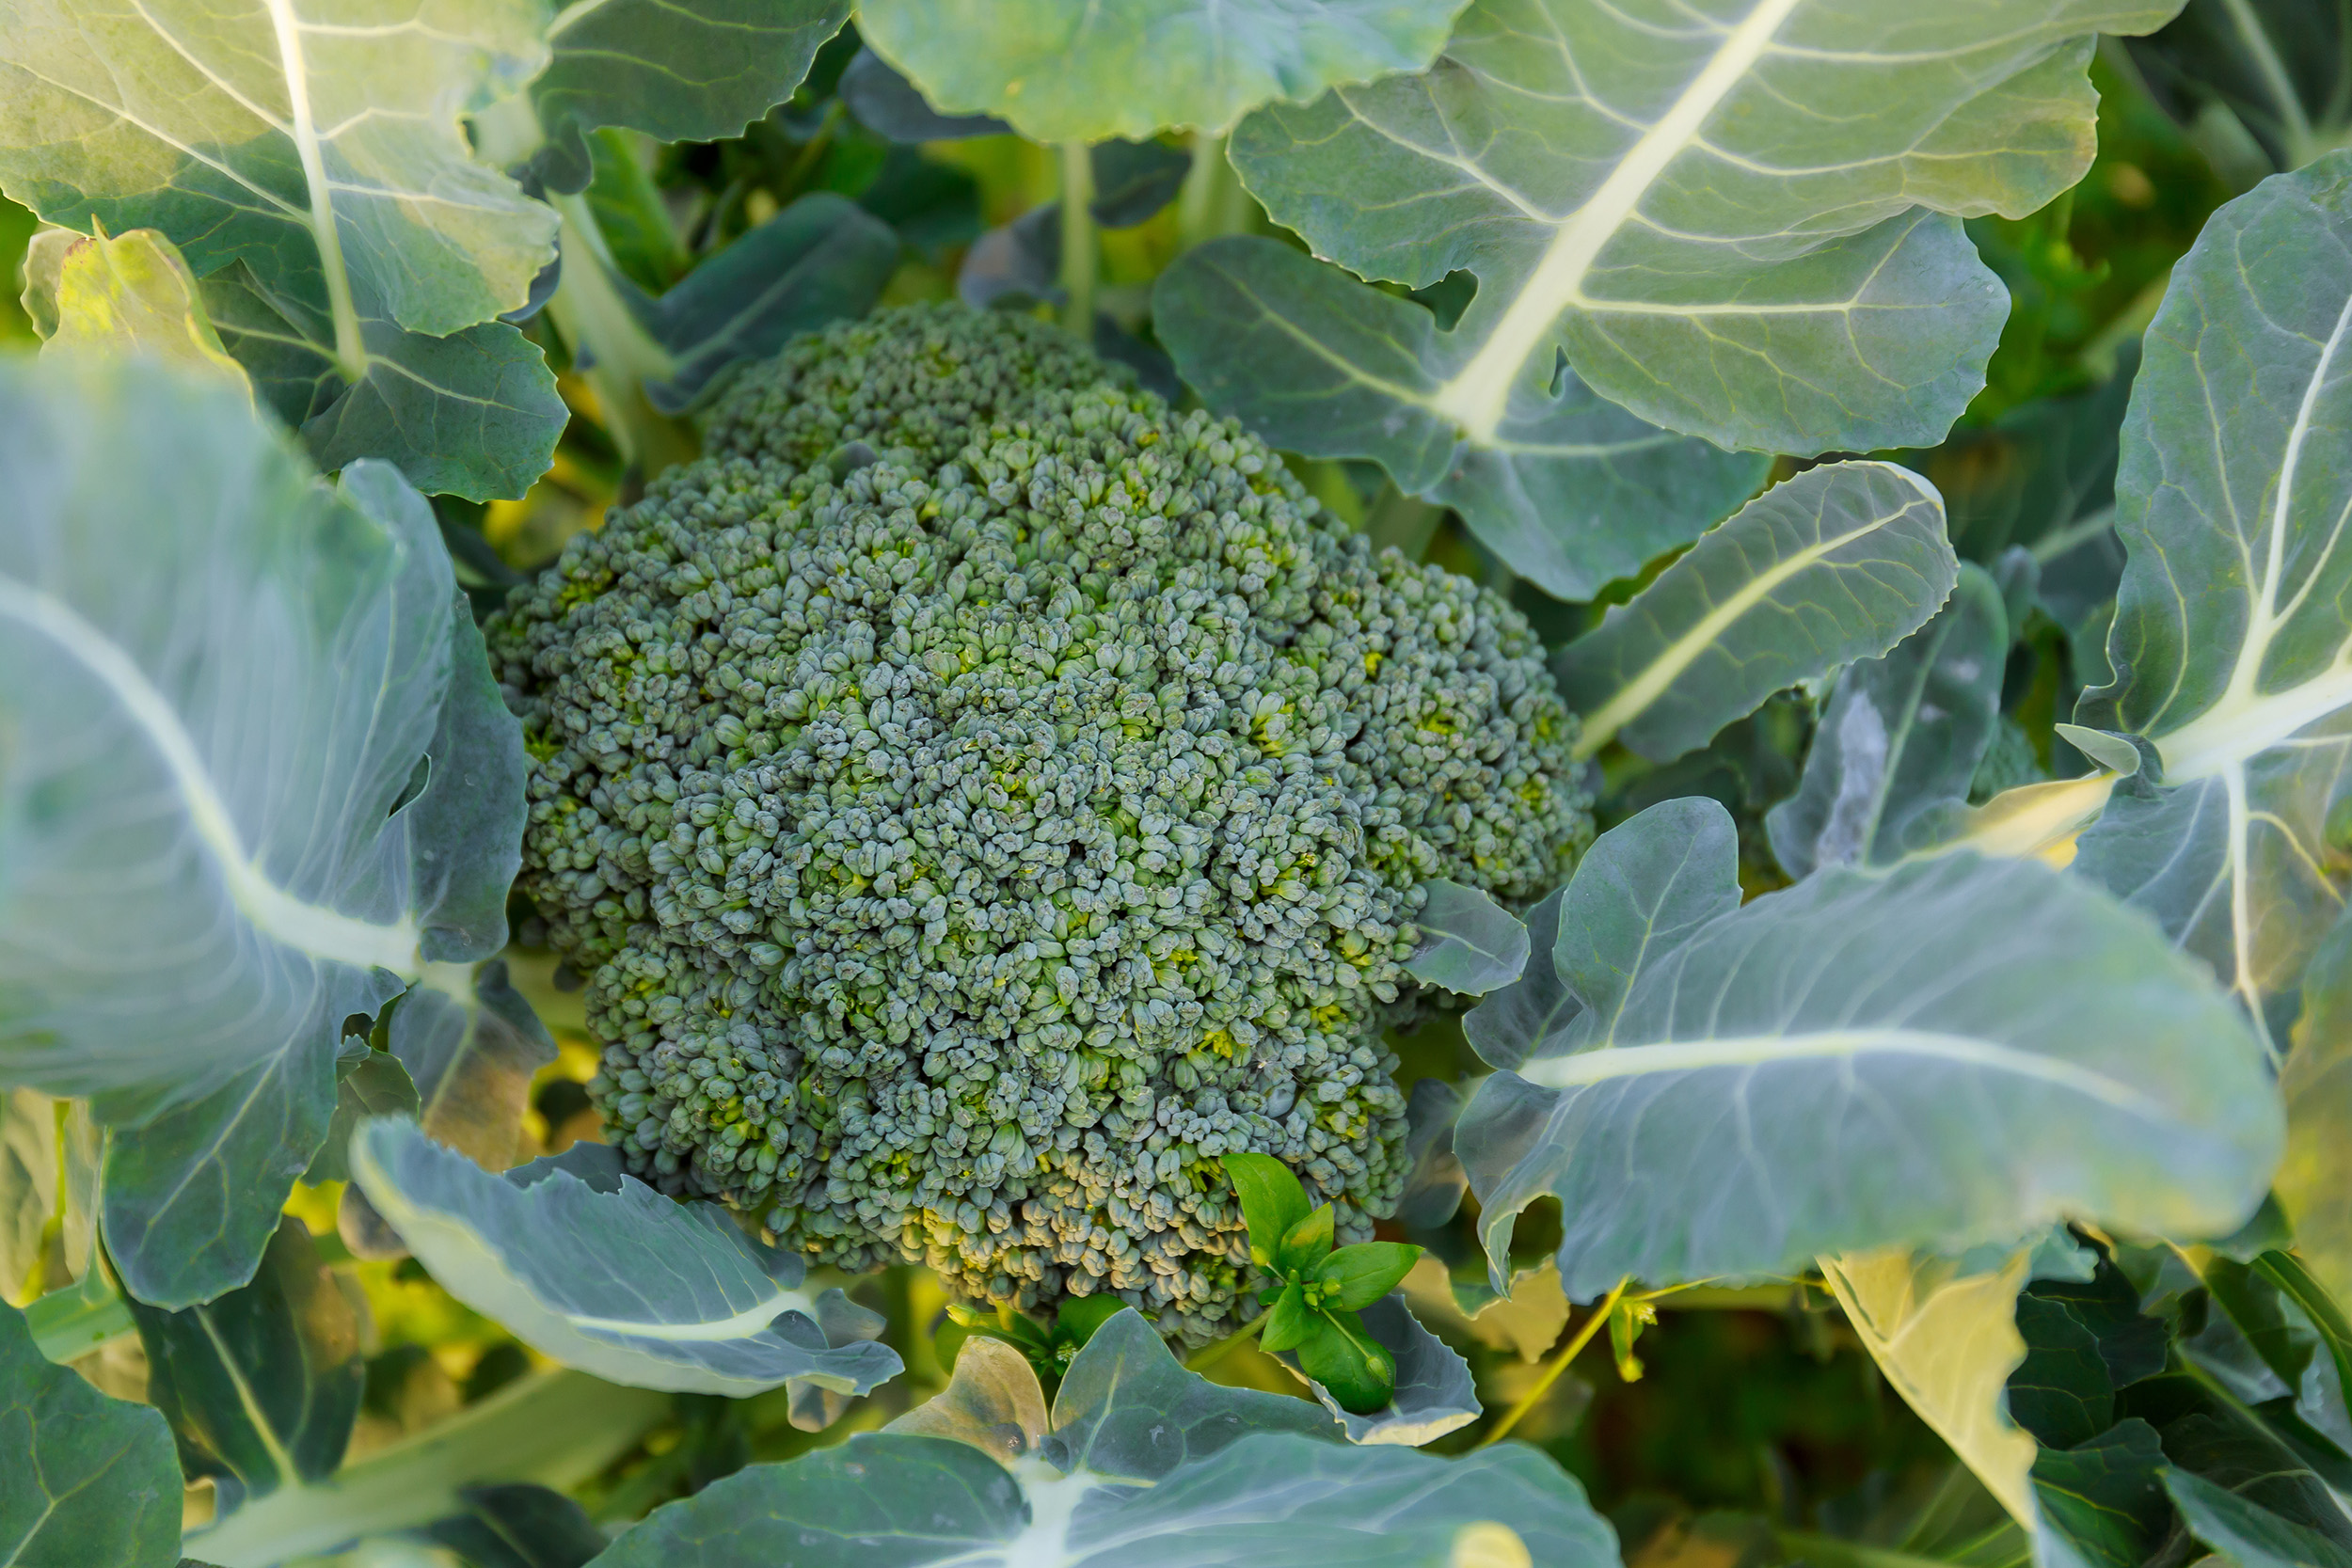
For gardeners in Memphis, Tennessee, broccoli is a cool-season crop that can be grown in both the spring and fall. The fall growing season is often more successful because the broccoli can mature during the cooler, shorter days of late autumn and early winter, which prevents it from bolting (flowering) prematurely.
Best Time to Plant
- For a spring crop: Start seeds indoors in February or early March, then transplant seedlings into the garden in mid-to-late March.
- For a fall crop: Start seeds indoors or outdoors in July or August, and transplant seedlings into the garden in September.
Site Selection and Soil Preparation
- Location: Choose a spot that gets at least six to eight hours of direct sunlight per day.
- Soil: Use rich, well-draining soil with plenty of organic matter, such as compost. The ideal soil pH is between 6.0 and 7.0.
Planting Seeds
- Transplanting: Harden off your seedlings by gradually exposing them to outdoor conditions over a week or two. Plant them in the garden at the same level they were in their pots.
- Spacing: Space plants 18 to 24 inches apart. If planting in rows, space rows about 36 inches apart.
- Container gardening: If you use containers, choose pots at least 18 inches deep and wide to accommodate the root system. Ensure they have good drainage.
Care and Maintenance
- Watering: Broccoli needs consistent moisture. Provide 1 to 1.5 inches of water per week through rain or irrigation. Water the soil directly, not the head, to prevent rot.
- Weeding and mulching: Keep the area around your plants free of weeds, being careful not to disturb the shallow roots. A layer of mulch will help retain soil moisture and suppress weeds.
Fertilizing
- Fertilizing: Broccoli plants are “heavy feeders.” Amend the soil with compost before planting and side-dress with fertilizer every couple of weeks after transplanting.
Pest Control and Prevention
- Pest control: Common pests include cabbage worms and aphids. Floating row covers are effective against caterpillars. Check the undersides of leaves for pests, and consider companion planting with pollinator-friendly flowers.
- When the seedlings are about 3 to 4 inches tall, thin them to 3 to 4 inches apart.
Harvesting
Harvest Timing
- Timing: Begin checking for growth daily as the main head starts to form. Harvest the head while the buds are still firm and tightly closed, before they begin to open and show yellow flowers.
- How to harvest: Cut the main stem at least 6 inches below the head. After harvesting the main head, the plant will often produce smaller, secondary shoots that you can continue to harvest.
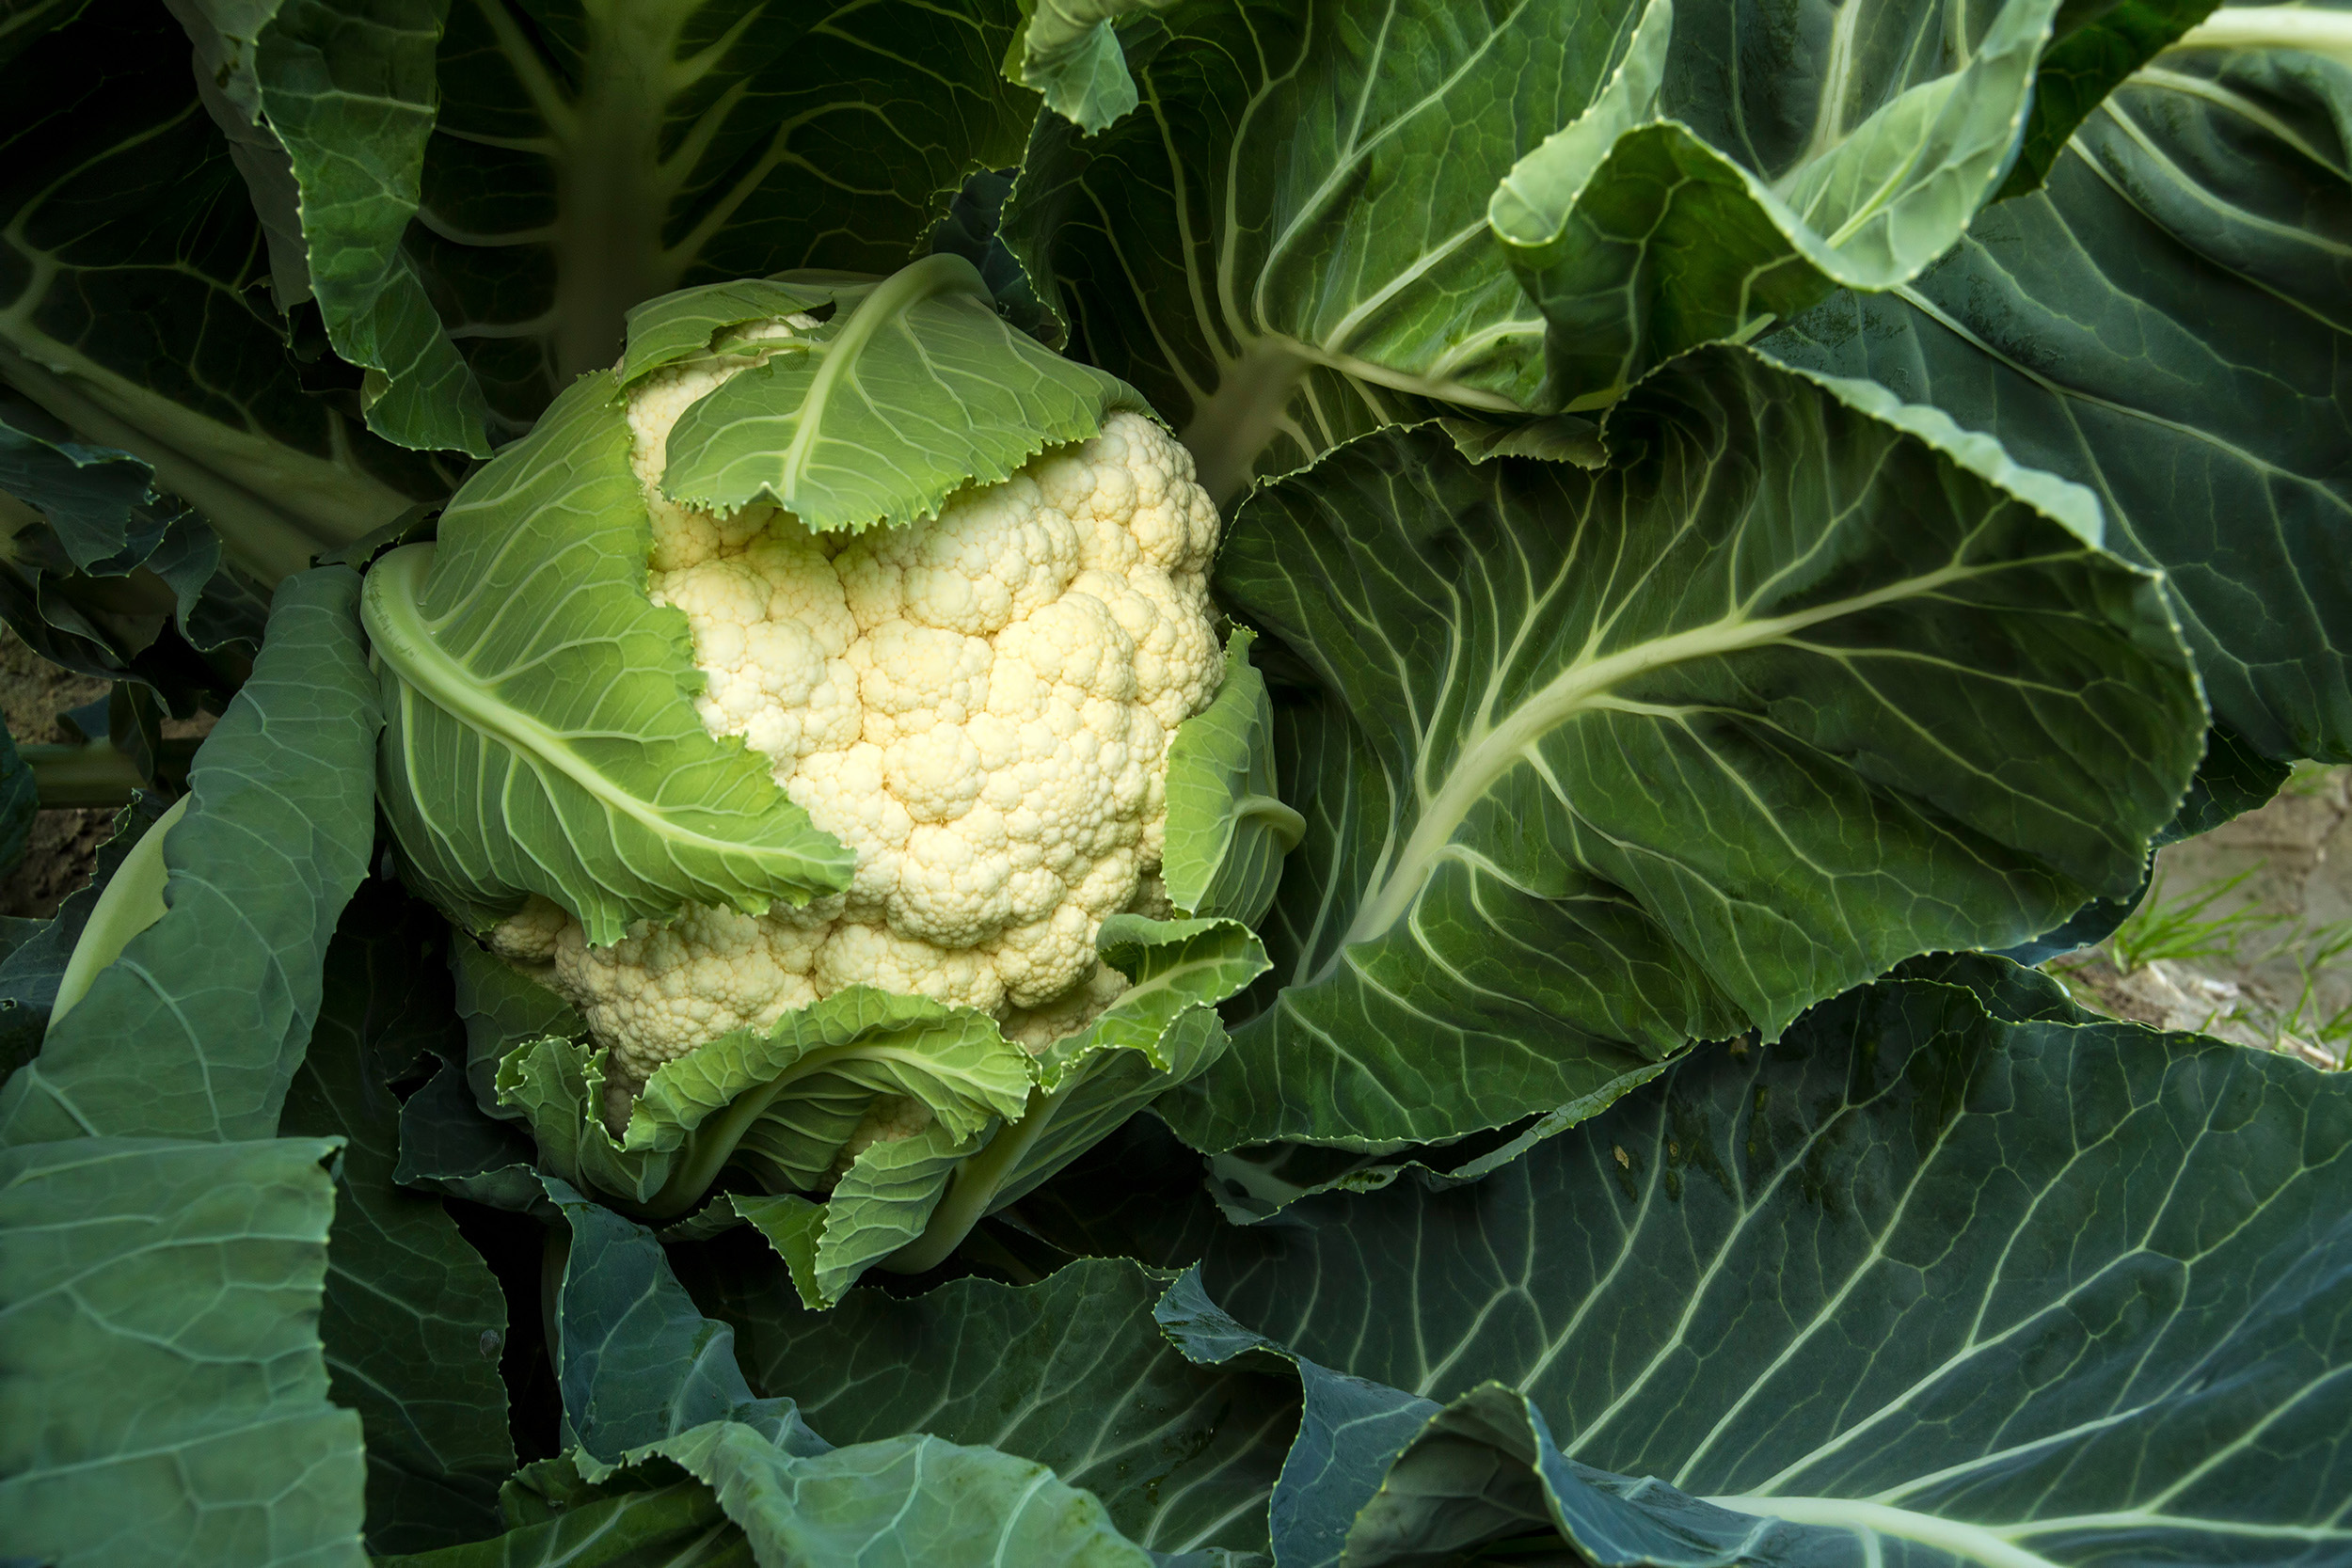
For gardeners in Memphis, Tennessee, growing cauliflower is best done as a fall crop to avoid the intense summer heat. Successful cultivation requires careful timing, fertile soil, and consistent watering.
Best Time to Plant
- For a fall harvest: Plant transplants in your garden in late August or early September, after daytime temperatures are consistently below 75°F. You can start seeds indoors 4–6 weeks before transplanting.
- For a spring harvest: Start seeds indoors in February and transplant seedlings into the garden in March. This is more challenging due to Memphis’s short, cool spring, and you will need to protect seedlings from late frosts.
Best varieties for Memphis
Because of the heat, choosing varieties known for heat tolerance and early maturity is crucial.
- Minuteman: A heat-tolerant hybrid that produces uniform, white heads.
- Snow Crown: An early-maturing, All-America Selections winner with good heat and cold tolerance.
- Graffiti: A purple variety with excellent heat tolerance.
- Moneera RZ: A versatile hybrid with good heat tolerance, suitable for summer and fall harvests.
Site Selection and Soil Preparation
- Sunlight: Choose a location that receives full sun, at least 6 to 8 hours daily.
- Soil: Cauliflower thrives in fertile, well-drained soil rich in organic matter. Add a generous amount of compost or well-rotted manure before planting. A soil pH between 6.5 and 6.8 is ideal.
- Amendments: Cauliflower is a heavy feeder. In addition to compost, side-dress with a nitrogen-based fertilizer four weeks after transplanting to encourage vigorous leaf growth.
Planting Seeds
- Spacing: Set transplants 18 to 24 inches apart in rows spaced 24 to 30 inches apart.
Care and Maintenance
- Mulch: Apply a 3-inch layer of organic mulch, such as straw or shredded leaves, to help the soil retain moisture, keep roots cool, and suppress weeds.
- Watering: Consistent moisture is essential. Water deeply and regularly, aiming for 1 to 1.5 inches of water per week, especially during dry spells. Inconsistent watering can cause small, underdeveloped heads, known as “buttoning”.
- Blanching: For white varieties, you may need to “blanch” the head to prevent it from yellowing and developing a bitter taste. When the head is about 2 to 3 inches in diameter, tie the outer leaves loosely over the top to block sunlight.
Harvesting
Harvest Timing
- Timing: The head, or curd, is ready to harvest when it is firm, compact, and 6 to 8 inches in diameter. This typically takes 50 to 100 days after transplanting.
- How to cut: Use a sharp knife to cut the head from the plant. Leave a few of the protective leaves attached to the base.
- Don’t wait: Once the head starts to loosen or separate, the quality will decline. If you see a flower emerging, you have waited too long.
Fall is a great time to grow beets in Tennessee, as the cooler temperatures enhance their sweetness. You’ll want to plant them in late summer to early fall to take advantage of the milder weather and avoid the extreme heat of mid-summer, which can cause beets to become woody.
Best Time to Plant
- Best time: Start sowing beet seeds in Tennessee from mid-August through September for a harvest in late fall and early winter.
- Time to maturity: Beets typically take about 50 to 70 days to mature, so be sure to check the specific variety you are planting.
- Frost tolerant: A light frost can even improve the flavor, so don’t rush to harvest immediately.
Site Selection and Soil
- Beets grow best in a sunny spot that receive at least six hours of direct sunlight per day.
- Work plenty of compost or other organic matter into the soil to a depth of 8 to 10 inches.
- The soil should be loose, well-drained, and free of rocks, which can cause the beet roots to become misshapen.
- For fall planting, heavier soil is acceptable as the weather cools, while lighter, sandy soil is preferred in the spring when the ground needs to warm up faster.
Planting Seeds
- Sow seeds about 1/2 inch deep and one inch apart.
- Keep rows 12 to 18 inches apart.
- Soaking seeds in warm water for 24 hours before planting can help speed up germination.
Watering
- Keep the soil consistently moist, especially during germination and early growth.
- A 1- to 2-inch layer of organic mulch, like chopped leaves or straw, will help retain moisture and keep weeds down.
Fertilizing
- Use a fertilizer with a higher ratio of phosphorus and potassium rather than nitrogen, as too much nitrogen will promote leafy greens at the expense of the root.
- A ratio such as 5-10-10 or 1-2-2 is ideal.
Thinning and Weeding
- Beet seeds often contain multiple seeds in one pod, so thinning is essential for good root development.
- When the seedlings are about 3 to 4 inches tall, thin them to 3 to 4 inches apart.
- Carefully pull or snip the smaller seedlings at soil level. The greens you remove can be used in salads.
- Keep the beet bed free of weeds, which compete for moisture and nutrients.
Harvesting
Harvest Timing
- Harvest the beets when the roots are about 1 1/2 to 3 inches in diameter for the most tender, flavorful harvest.
- You can also harvest some of the greens once the roots are at least 1 inch across, but only take a few leaves per plant to allow the root to keep developing.
Because lettuce is a cool-season crop, the key to growing it successfully in Memphis is to plant during the cooler months of spring and fall while using heat-management techniques to extend the growing season.
Best Time to Plant
- Spring planting: Start planting your lettuce seeds or transplants from mid-February to early March.
- Fall planting: In Tennessee, the ideal time to sow lettuce seeds for a fall harvest is in late August and into September. This allows the plants to mature as temperatures cool down.
How to Manage the Summer Heat
Memphis summers are too hot for most lettuce varieties, which will turn bitter and “bolt” (go to seed) when temperatures consistently exceed 75–80°F.
- Choose heat-tolerant varieties: Select loose-leaf, butterhead, or romaine varieties bred to be slow-bolting. Good options include ‘Black Seeded Simpson,’ ‘Buttercrunch,’ ‘Parris Island Romaine,’ ‘Jericho,’ ‘Nevada,’ and ‘Red Sails’.
- Start seeds indoors: Germinate seeds in a cool indoor environment and then transplant the seedlings outside.
- Provide shade: During the warmest parts of the season, give your lettuce afternoon shade by planting on the east side of taller plants or using a 40% shade cloth.
- Keep the soil cool and moist: Use a layer of mulch to retain soil moisture and keep the roots from getting too hot. In extreme heat, wet the soil thoroughly before transplanting.
- Harvest as baby greens: If your plants are bolting in the heat, harvest them early as baby greens.
Site Selection and Soil
- Lettuce grows best in fertile, well-drained soil rich in organic matter. Work compost into your garden bed. Lettuce has a shallow root system, making it a great candidate for raised beds or containers.
Planting Seeds
- Seeds: Sow seeds thinly on the surface of the soil, covering them with only a very thin layer of dirt, as they need light to germinate.
- Transplants: Space transplants 6 to 18 inches apart, depending on the variety.
Watering
- Water consistently. Lettuce is 90% water and has shallow roots, so keep the soil consistently moist. Avoid overhead watering to prevent mildew.
Fertilizing
- About two weeks after planting, apply a nitrogen-rich fertilizer like fish or seaweed emulsion to promote leafy growth.
Pest and Disease Prevention
- Aphids are a common pest and can be controlled with a gentle spray of water. Slugs can be managed by hand-picking or using diatomaceous earth.
Harvesting
Harvest Timing
- Loose-leaf varieties: Harvest individual outer leaves while leaving the central bud to continue producing.
- Head varieties: Harvest the entire head by cutting it off at the base when it reaches the desired size.
Tip for Extended Harvest
- To enjoy fresh lettuce for a longer period, use succession planting. Sow a new batch of seeds or plant new transplants every couple of weeks throughout the spring and fall seasons. This ensures a staggered, continuous harvest.

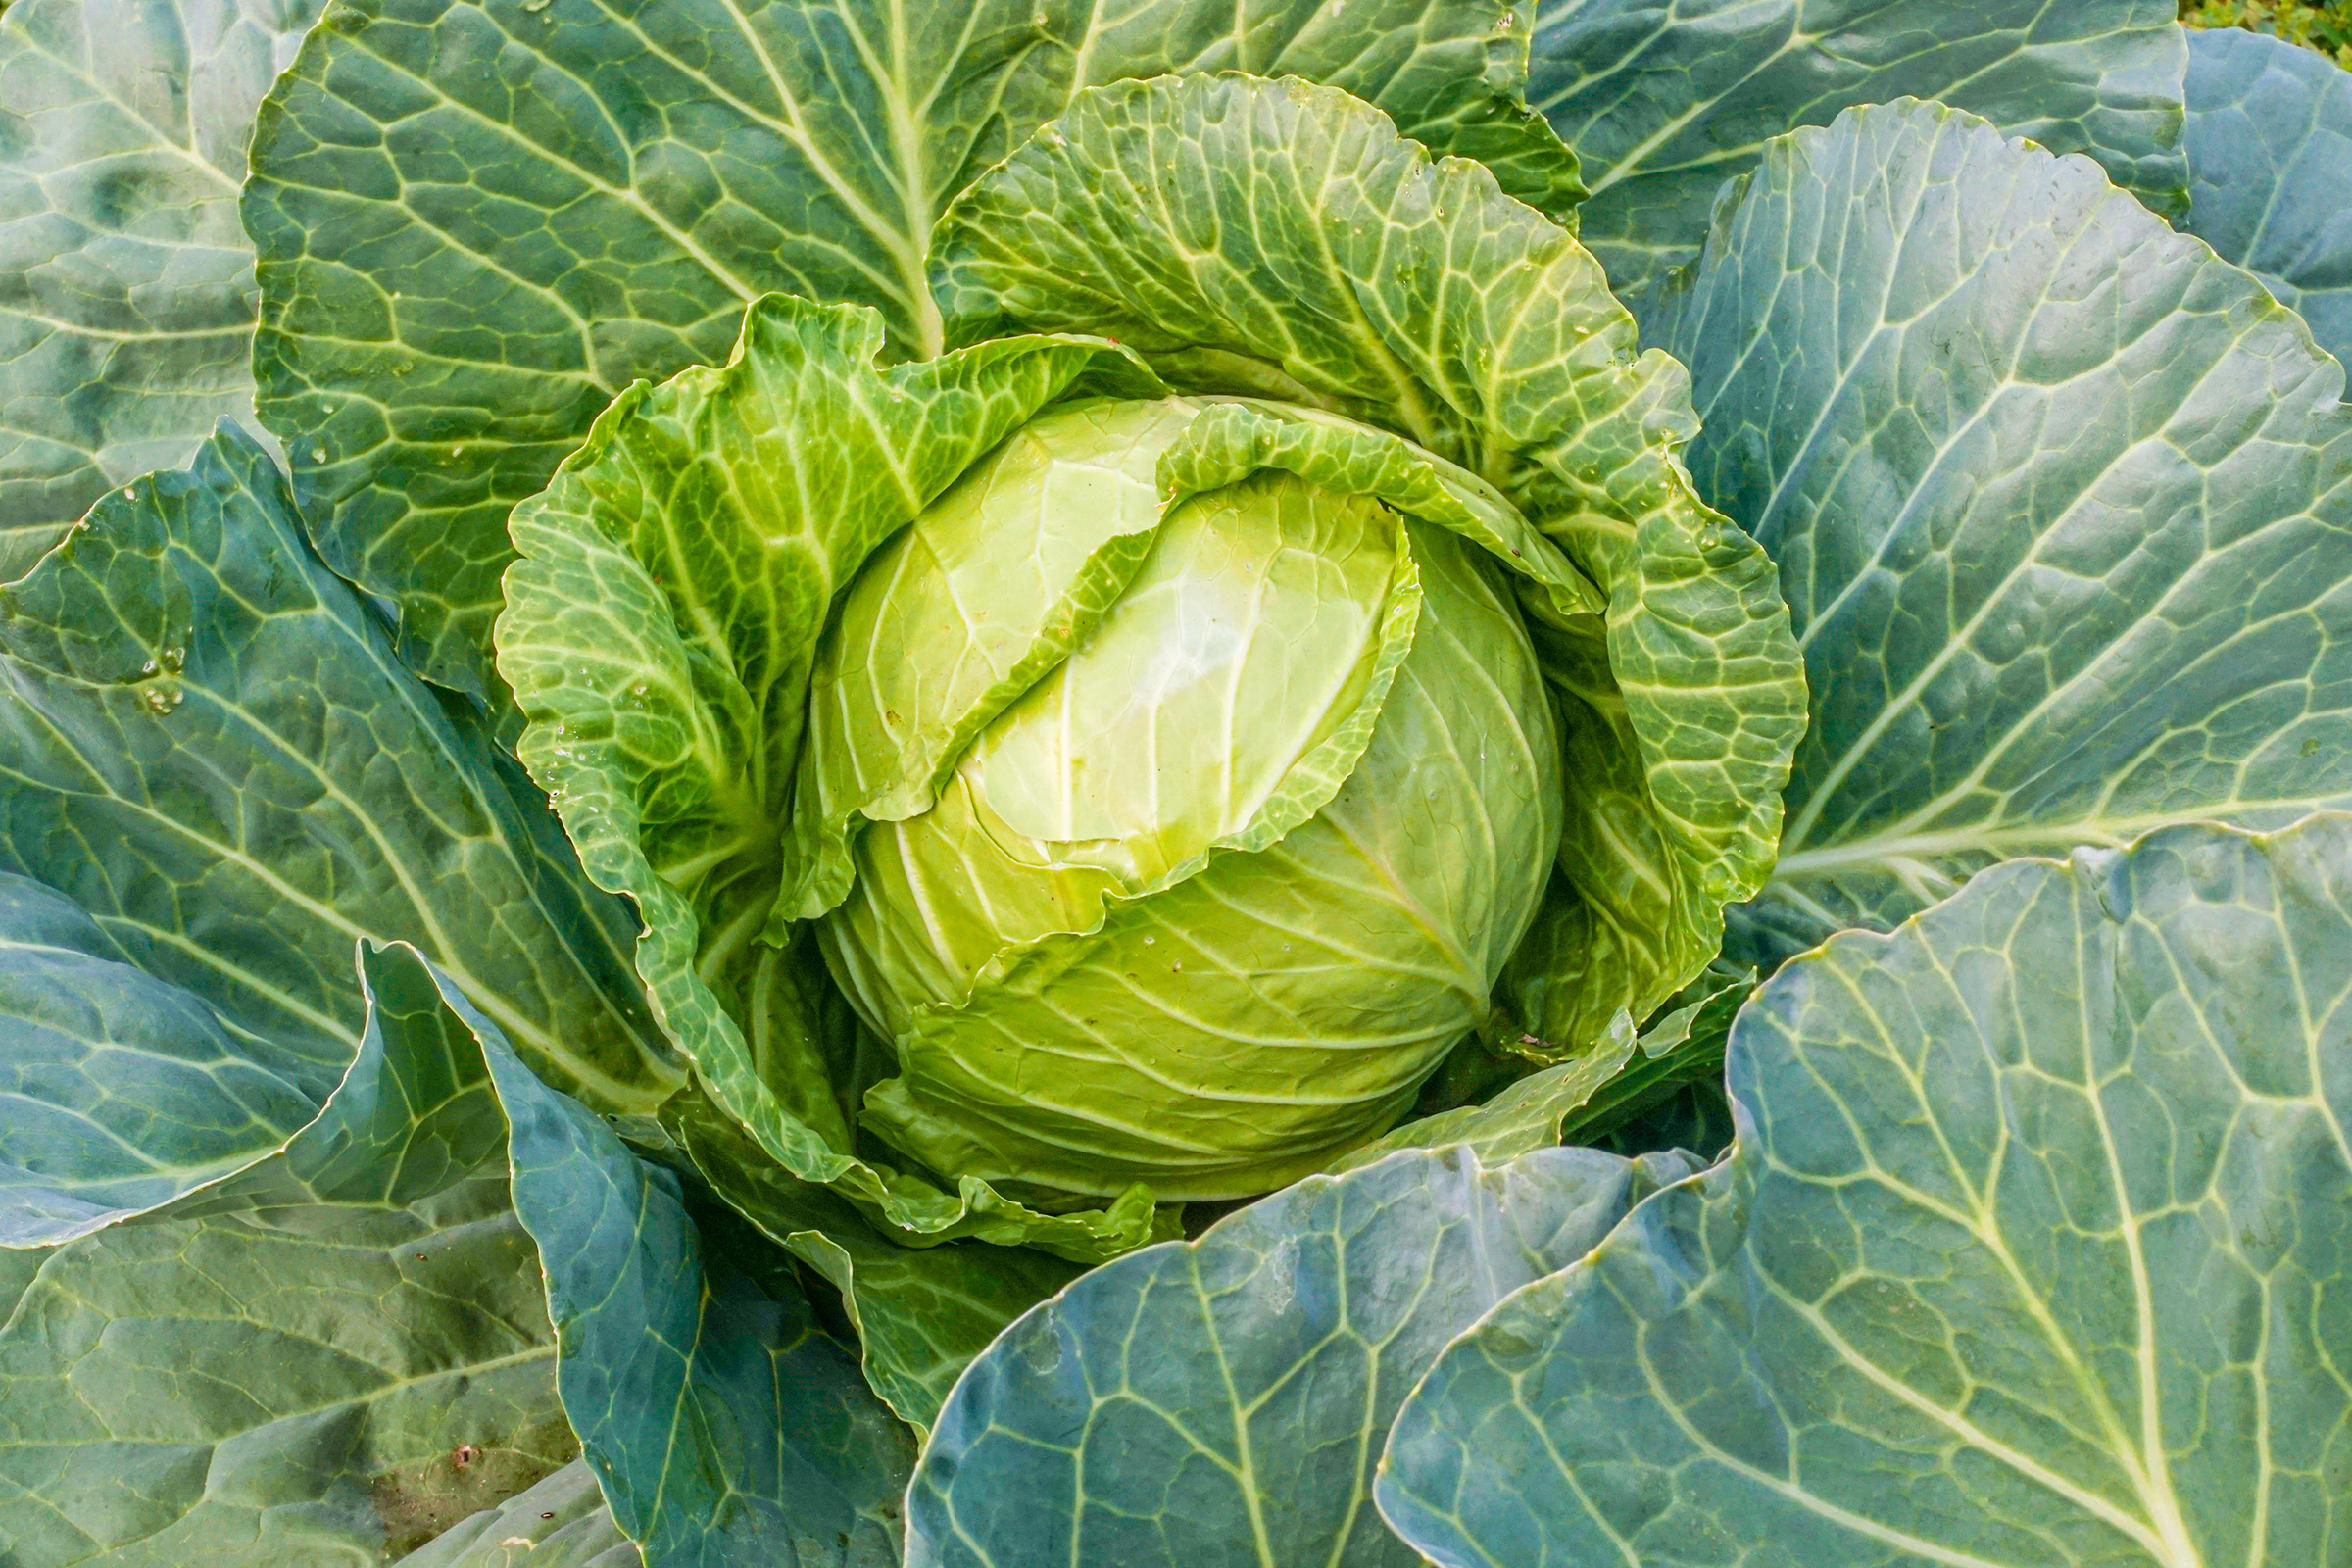
To grow cabbage successfully in Tennessee for a fall harvest, you should plant it during the cool, late summer months of August and early September. The milder temperatures and reduced pest activity compared to spring can lead to a more flavorful and sweeter crop.
Best Time to Plant
- Plant seeds or transplants between mid-August and early September. Planting too late may not allow the heads enough time to mature before a hard freeze.
- Use transplants: Since you are planting later in the season, using transplants is a good way to give your plants a head start.
Site Selection and Soil
- Choose a spot with at least six to eight hours of full sun each day.
- Cabbage thrives in fertile, well-drained, loamy soil with a pH between 6.0 and 7.0.
- Enrich the soil with several inches of organic matter, such as compost or aged manure, to provide the necessary nutrients.
Planting Seeds
- Space plants about 12 to 24 inches apart, depending on the variety.
- Plant the seedlings about an inch or two deeper than they were in their pots
Watering
- Cabbage needs consistent moisture, so provide 1 to 1.5 inches of water per week, especially as the heads begin to form. Water deeply and regularly to prevent the heads from splitting.
Mulching
- Apply a 3-inch layer of organic mulch, such as straw or chopped leaves, to help the soil retain moisture and suppress weeds.
Fertilizing
- Cabbage is a heavy feeder, so you should fertilize regularly.
- Use a nitrogen-rich fertilizer like fish emulsion or compost tea every 2 to 3 weeks until the heads begin to form.
Pest and Disease Prevention
- Fall-planted cabbage is less prone to pests than spring crops, but you should still watch for cabbage worms and aphids. A mesh netting or row cover can provide protection.
Harvesting and Storing
Harvest Timing
- Harvesting: Harvest your cabbage when the heads are firm and have reached the desired size for the variety.
Storing
- For short-term storage, you can keep heads wrapped in the refrigerator for up to two months. For longer storage, a root cellar can keep them for several months.
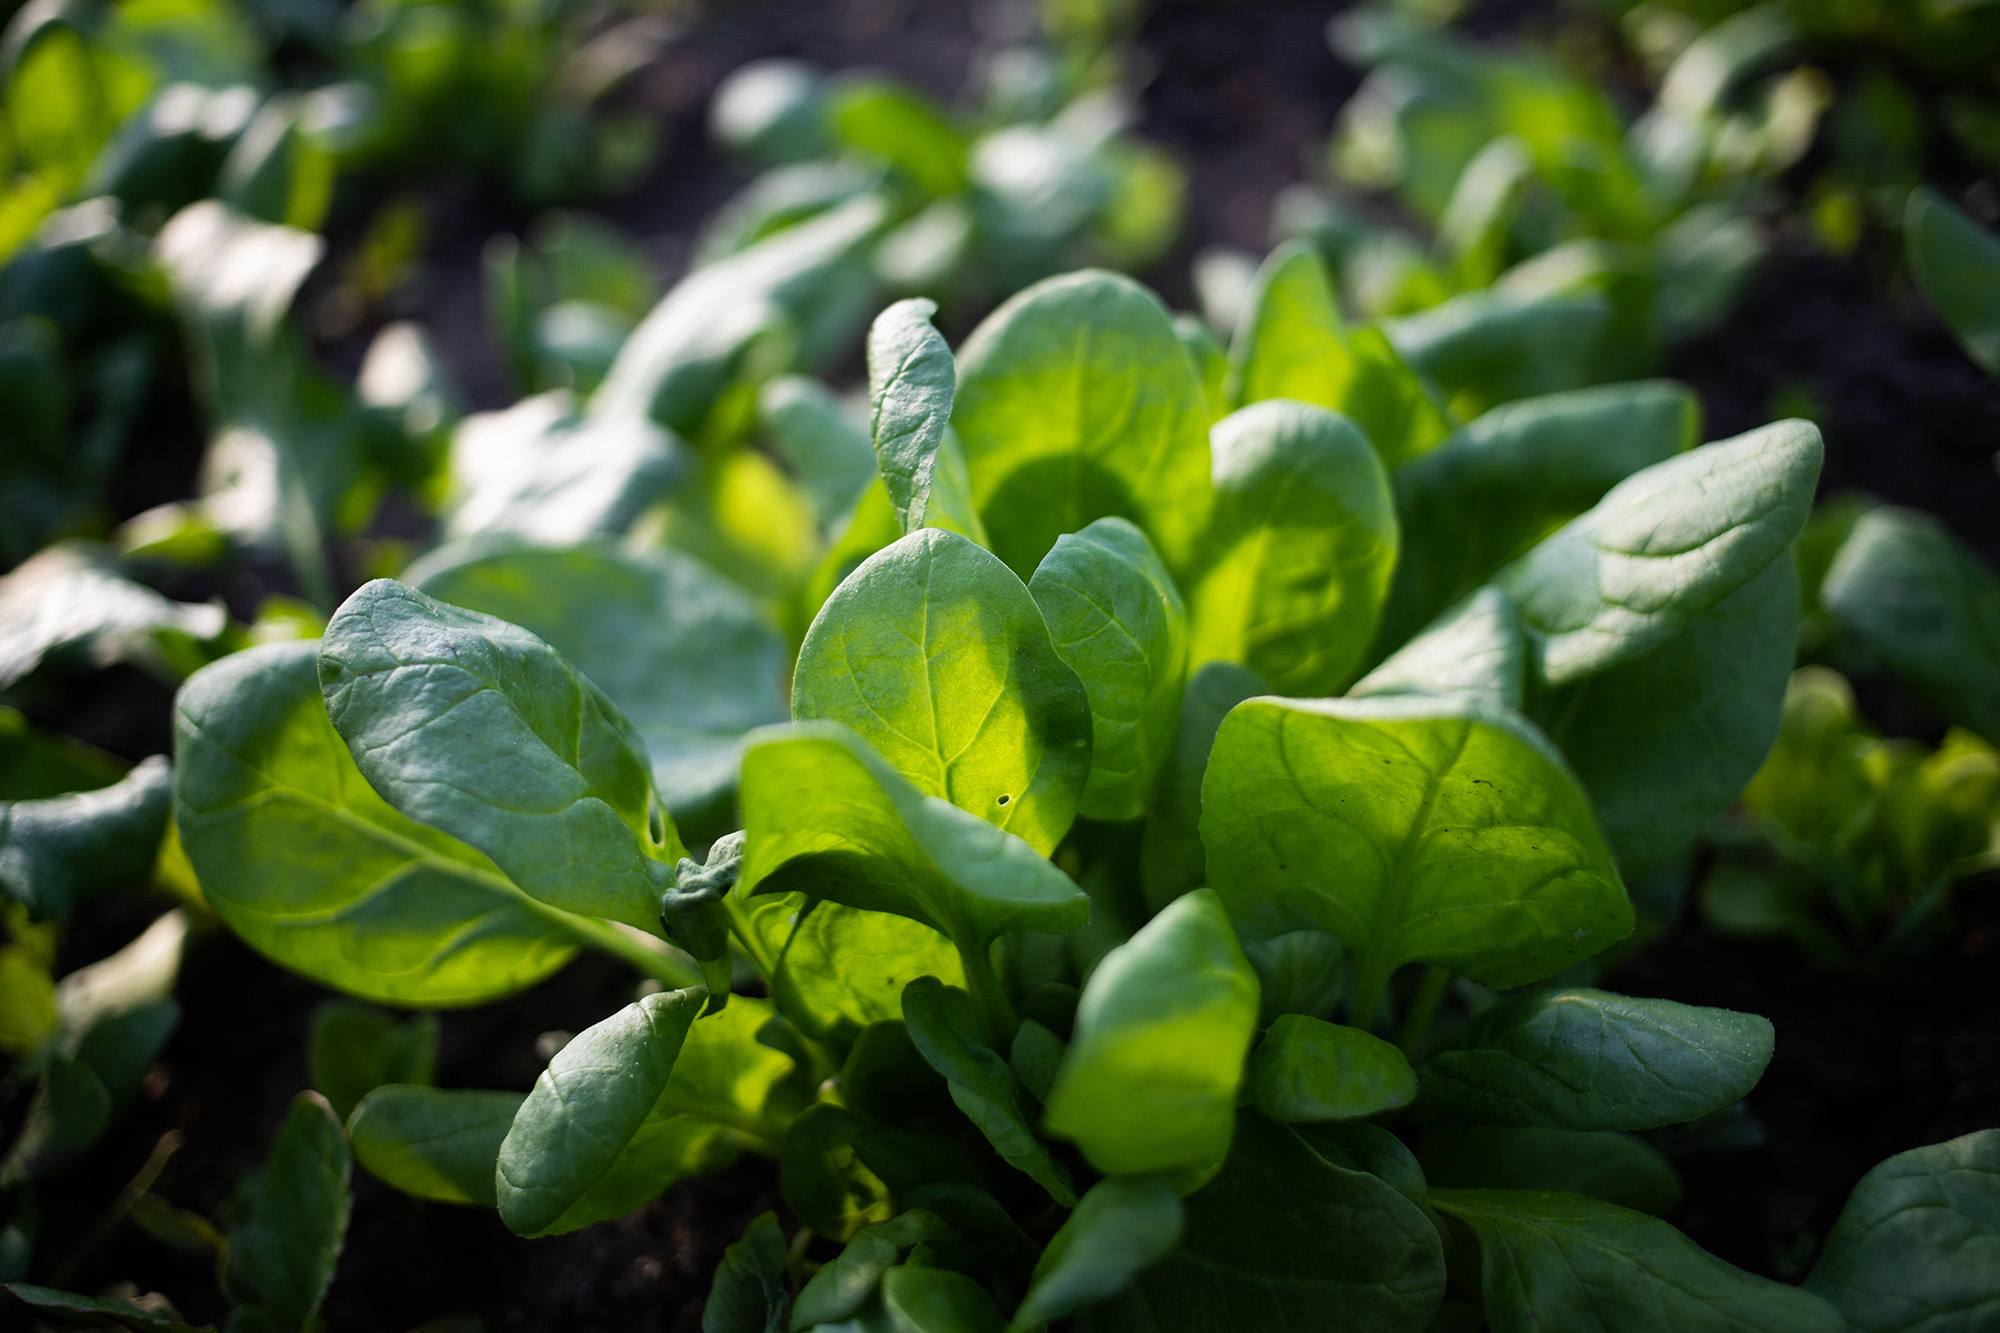
You can grow a successful crop of spinach in Tennessee during the fall by planting in late summer and early fall. The shorter days and cooler temperatures of autumn prevent the spinach from “bolting” (producing flowers and seeds) and turning bitter, while also enhancing its flavor.
Best Time to Plant
- The best time to plant spinach for a fall harvest in Tennessee is from late August through September.
- For an overwintered crop that provides an early spring harvest, you can sow seeds in September or October.
Site Selection and Soil
- Choose a spot that gets full sun to part shade. Spinach grows best in fertile, well-drained soil rich in organic matter.
- Work several inches of compost or aged manure into the soil to improve its moisture retention and nutrient content.
Planting Seeds
- Sow seeds about 1/2 to 1 inch deep and 2 inches apart. Space your rows 12 to 18 inches apart. You can also broadcast seeds over a prepared bed.
- Tip for warmer weather: If you’re planting in late summer while soil temperatures are still high, soak your seeds in warm water for 24 hours before planting or pre-sprout them in the refrigerator.
Watering
- Keep the soil consistently moist but not waterlogged. In Tennessee’s warmer early fall weather, you may need to water frequently to prevent the soil from drying out. A soaker hose is an excellent tool for providing consistent moisture.
Mulching
- Apply a layer of organic mulch like straw or chopped leaves to help keep the soil moist and cool, which is especially important during the last warm days of late summer.
Fertilizing
- Spinach is a heavy feeder. Side-dress the plants with a nitrogen-rich fertilizer or compost tea about two weeks after planting to support leafy growth.
Weeding and Thinning
- Once seedlings have grown a few inches tall, thin them to 4 to 6 inches apart to allow for proper growth. You can use the thinned seedlings in salads.
Harvesting and Storing
Harvest Timing
- Harvesting method: You can begin harvesting baby spinach leaves when they reach about 3 inches long. For mature leaves, wait until they are 6 inches long.
- Sustained harvest: Harvest the outer leaves first, allowing the inner leaves to continue growing. This “cut-and-come-again” method extends your harvest.
- Overwintering: For an early spring crop, sow seeds in September and cover the plants with a row cover or mulch before the first hard frost.